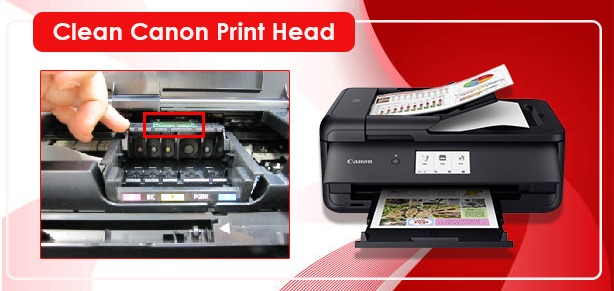
How To Clean Canon Print Head In Easy Steps?

Posted By : John Allen
At times, cleaning the Canon print head becomes essential when users are not satisfied with the printing outputs. When the printer doesn’t print color or print blank pages, it is due to a clogged printhead. That’s why it is mandatory to “clean canon print head”. In addition, the printer fails to release the ink on the paper even when there is sufficient ink. To fix the color printing issue of the Canon printer, it is important to clean the printhead after a few days of printing.
So, check the methods below to clean the printhead with ease.
Method 1. Printhead Automatic Cleaning
In this method, we are going learn how to clean Canon printer Heads automatically. So, let’s check some steps given below.
- First, turn on the Canon printer.
- Second, press the setup icon available on the printer.
- Next, choose the “Maintenance” tool icon.
- After that, go to the “Cleaning” tab and press the “Yes” option.
- After that, the printer will automatically take a few minutes to clean the printhead.
- Once this automatic cleaning process is done, give the print command to your printer.
- Hopefully, you will now get prints that will fulfill your requirements.
- At last, the process to clean Canon print head will be completed.
But in case you are still getting the fade printing or blank page, let’s check the manual procedure to clean the printhead.
Method 2. Deep Cleaning OfPrinthead On Windows
If your Canon printer is still giving poor print quality, you need to do a deep cleaning of the printhead.
- At first, make sure you have sufficient A-4 size paper.
- Next, turn on your Canon printer.
- Now, install those plan A-4 size papers in the printer’s tray.
- Thereafter, take the printer output tray out of the printer by removing the front cover.
- After that, open the printer driver setup window.
- Further, go to the “Maintenance” tab.
- Then, you will find the “Deep Cleaning” option.
- Simply, press the “Deep Cleaning” button.
- Later, select the ink group to clean the printhead deeply.
- Then, click the “Execute” option to initiate the cleaning process.
- Confirm and press the “Ok” button.
- Subsequently, hit “Print Check Pattern”.
- After this, the deep cleaning of the printhead will be done.
Moreover, if you are a Mac user and want to deep clean the printhead of the printer, follow the steps given below.
Method 3. Deep Clean Printhead On Mac
- To deep clean the printhead on Mac, ensure the printer is on.
- Now, click the Canon printer utility dialog box.
- Thereafter, choose the “Cleaning” option in the pop-up menu.
- Then, go to the “Deep Cleaning” tab on your device.
- Select the ink group to initiate the deep cleaning process of the printhead.
- After that, hit the “Ok” button.
- Now, the blue light will flash. It indicates the process that the clearing of the printhead has begun.
- Next, click “Print Check Pattern”.
- Finally, click “Quit”.
In case your printhead is still clogged, you can repeat the same process after one day. This will get you the results you want to have.
Furthermore, if your printer is not printing the color you want it to print, you need to change the ink cartridges.
Faulty ink cartridges need to be replaced to get desired printing results.
Method 4. Manual Cleaning Printhead Using Wet Towel
If you are still struggling with How to clean printer head Canon, clean the printhead manually using a wet paper towel.
- To begin with, take a paper towel with warm water.
- Now, carefully remove the printhead from the printer and put it onto the towel carefully.
- After that, hold the printhead along with the ink cartridges facing down against the dry paper towel for a few seconds.
- Make sure that you don’t wipe the printhead with a wet paper towel as this may cause damage to the printhead.
- Once you are done with it, install the cartridges back into your printer carefully.
- Ultimately, you can conduct a print test.
In addition, you can also apply the same steps, if you want to learn how to clean Canon Pixma Printer heads.
Conclusion
Indeed with the above methods, you must have learned to clean Canon print head using automatic and manual procedures. Also, get further help and guidance to clear doubts regarding the cleaning of your Canon printer print head. To learn about clean canon printer heads go for the canon printer support expert.